

I Turned a Kitchen Disaster into the Fluffiest Turkish Flower Bread (No-Knead Recipe)
Easy Çiçek Ekmeği with a video tutorial

I’m so glad you’ve stopped by. I’m Leslie, an enthusiastic home cook who loves making dishes that delight others. I am particularly fond of Turkish food, no-knead breads, and meals that hold memories. Most of all, I love sharing them with you!
If you enjoy this post, it would mean so much if you’d subscribe and click the ❤️ button at the bottom. I read and respond to all comments, so if you have any thoughts or feedback, or just want some help in the kitchen, drop me a note!
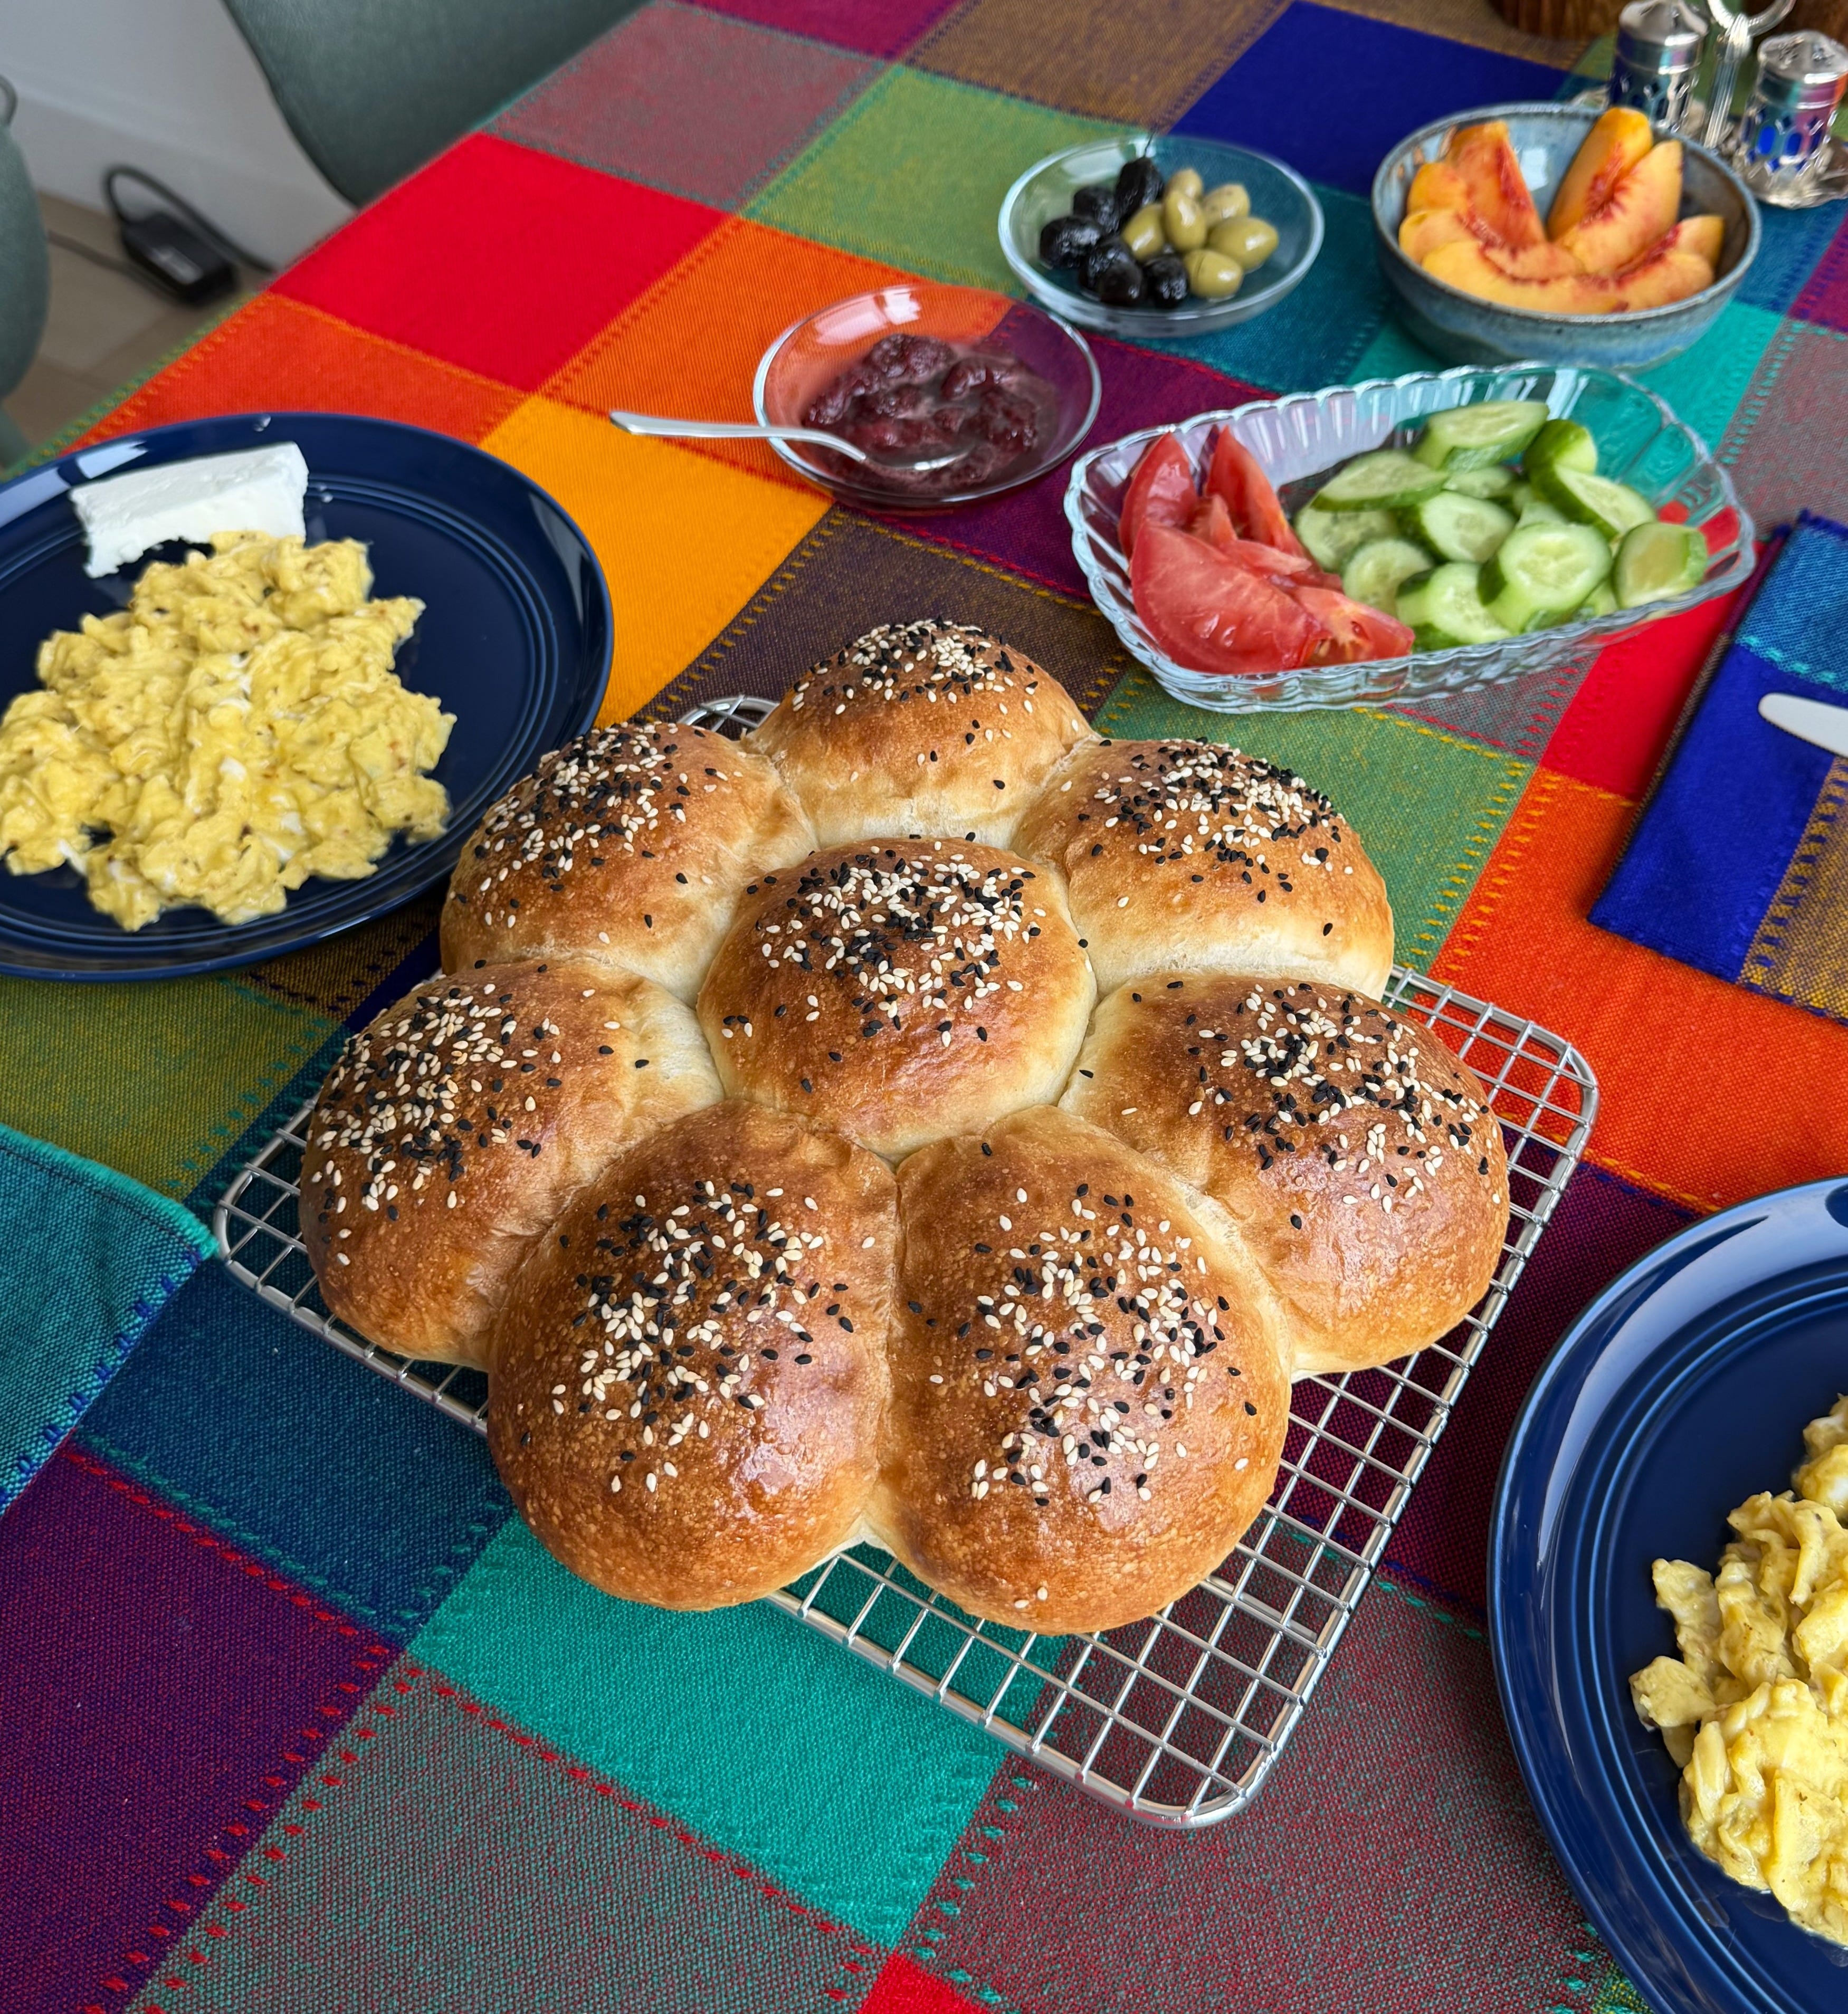
Scroll down to get right to the recipe
Once upon a time (three years ago), my husband announced that he wanted to bake bread for me. Not just any bread though, it had to be çiçek ekmeği.
Çiçek ekmeği, which translates to “flower bread,” is a specific type of Turkish bread that is shaped liked a daisy.
Bulut had fond memories of it from his childhood, and knowing how much I love Turkish food, he wanted me to be able to taste it.
So, he looked up recipes, in Turkish, of course. And that is where things got … sticky, shall we say?
For as amazing as Turkish food is, it has always been shrouded in a bit of mystery for those who didn’t grow up cooking with their mothers and grandmothers. Not to mention that even if my husband had been invited into the kitchen (he wasn’t), he would have never learned how to make bread because most Turks don’t make bread at home. There is a firin, a bakery, every few blocks in most towns and cities, so fresh bread is always easily available.
In any case, he followed a recipe that instructed to “use as much flour as it takes” and “knead until it feels like an earlobe.”
Are you laughing yet? Or perhaps touching your earlobe trying to figure out what that means? Trust me, I still don’t know.
The best (or worst) thing about this whole situation is that it isn’t some fluke phrasing. These words are actually written in almost EVERY Turkish bread recipe.
As Bulut mixed the ingredients together, it turned into a sticky mess. He kept kneading vigorously to try to make the dough come together, but it seemed to make things worse. He figured that it could “take more flour.” But the dough seemed to swallow the flour almost as quickly as he added it.
While we weren’t positive what “earlobe consistency” meant, we were sure this was not it.
I wanted to help, but I knew that I couldn’t do anything differently or better, so in a desperate grasp for words of encouragement, I blurted out, “You go, babe. BECOME THE STAND MIXER!”
I watched him knead with mixed emotions of horror and amazement. We kept laughing and repeating, “Become the stand mixer!”
I don’t recall how Bulut managed to wrangle the dough into balls, but he somehow did. In the end, the bread turned out pretty nice-looking. We were so excited that we took some glamour shots with it:


When it was finally ready to enjoy, we sat down at the table and Bulut handed me a roll.
I took a bite.
“Soooo…” Bulut said in hesitant excitement, “Do you like it?”
I smiled, as I did my best to swallow both the bread and my feedback.
“Is it usually dense like this?” I asked.
Bulut tasted it and said, “Hmm. This is more dense than usual.”
Let’s just say that after that experience, Bulut never mentioned wanting to make çiçek ekmeği again.
That is, until two weeks ago.
We were brainstorming a menu for Turkish breakfast that we’re hosting soon (I’m planning to document the details in next week’s post- yay!). The topic of bread came up, and Bulut said, “How about çiçek ekmeği?”
“Çiçek ekmeği?” I said as images of Bulut’s vigorous kneading came flooding back. I remembered the underwhelm when I took my first bite of çiçek ekmeği a few years ago. I didn’t want to relive that. I didn’t want to further tarnish my husband’s memory of this beloved bread.
“Are you sure you don’t want bazlama or pide or something I know how to make?”
Bulut was quiet.
He knew that I knew that he knew it is not in my character to turn down a baking challenge. Specifically, when it comes to making a meaningful dish for someone else, I will do my best to recreate it.
I pushed down the slight feelings of panic and said, “Ok, I’ll try it out.”
With everything I’ve learned about breadmaking in the last year, I felt like I could develop a recipe free of stress, or sticky messes, or mention of earlobes.
To come up with this recipe, I read a handful of çiçek ekmeği recipes and saw that they all use lightly enriched doughs. I applied an overnight, no-knead technique to the basic ingredient ratios, and it worked like a charm.
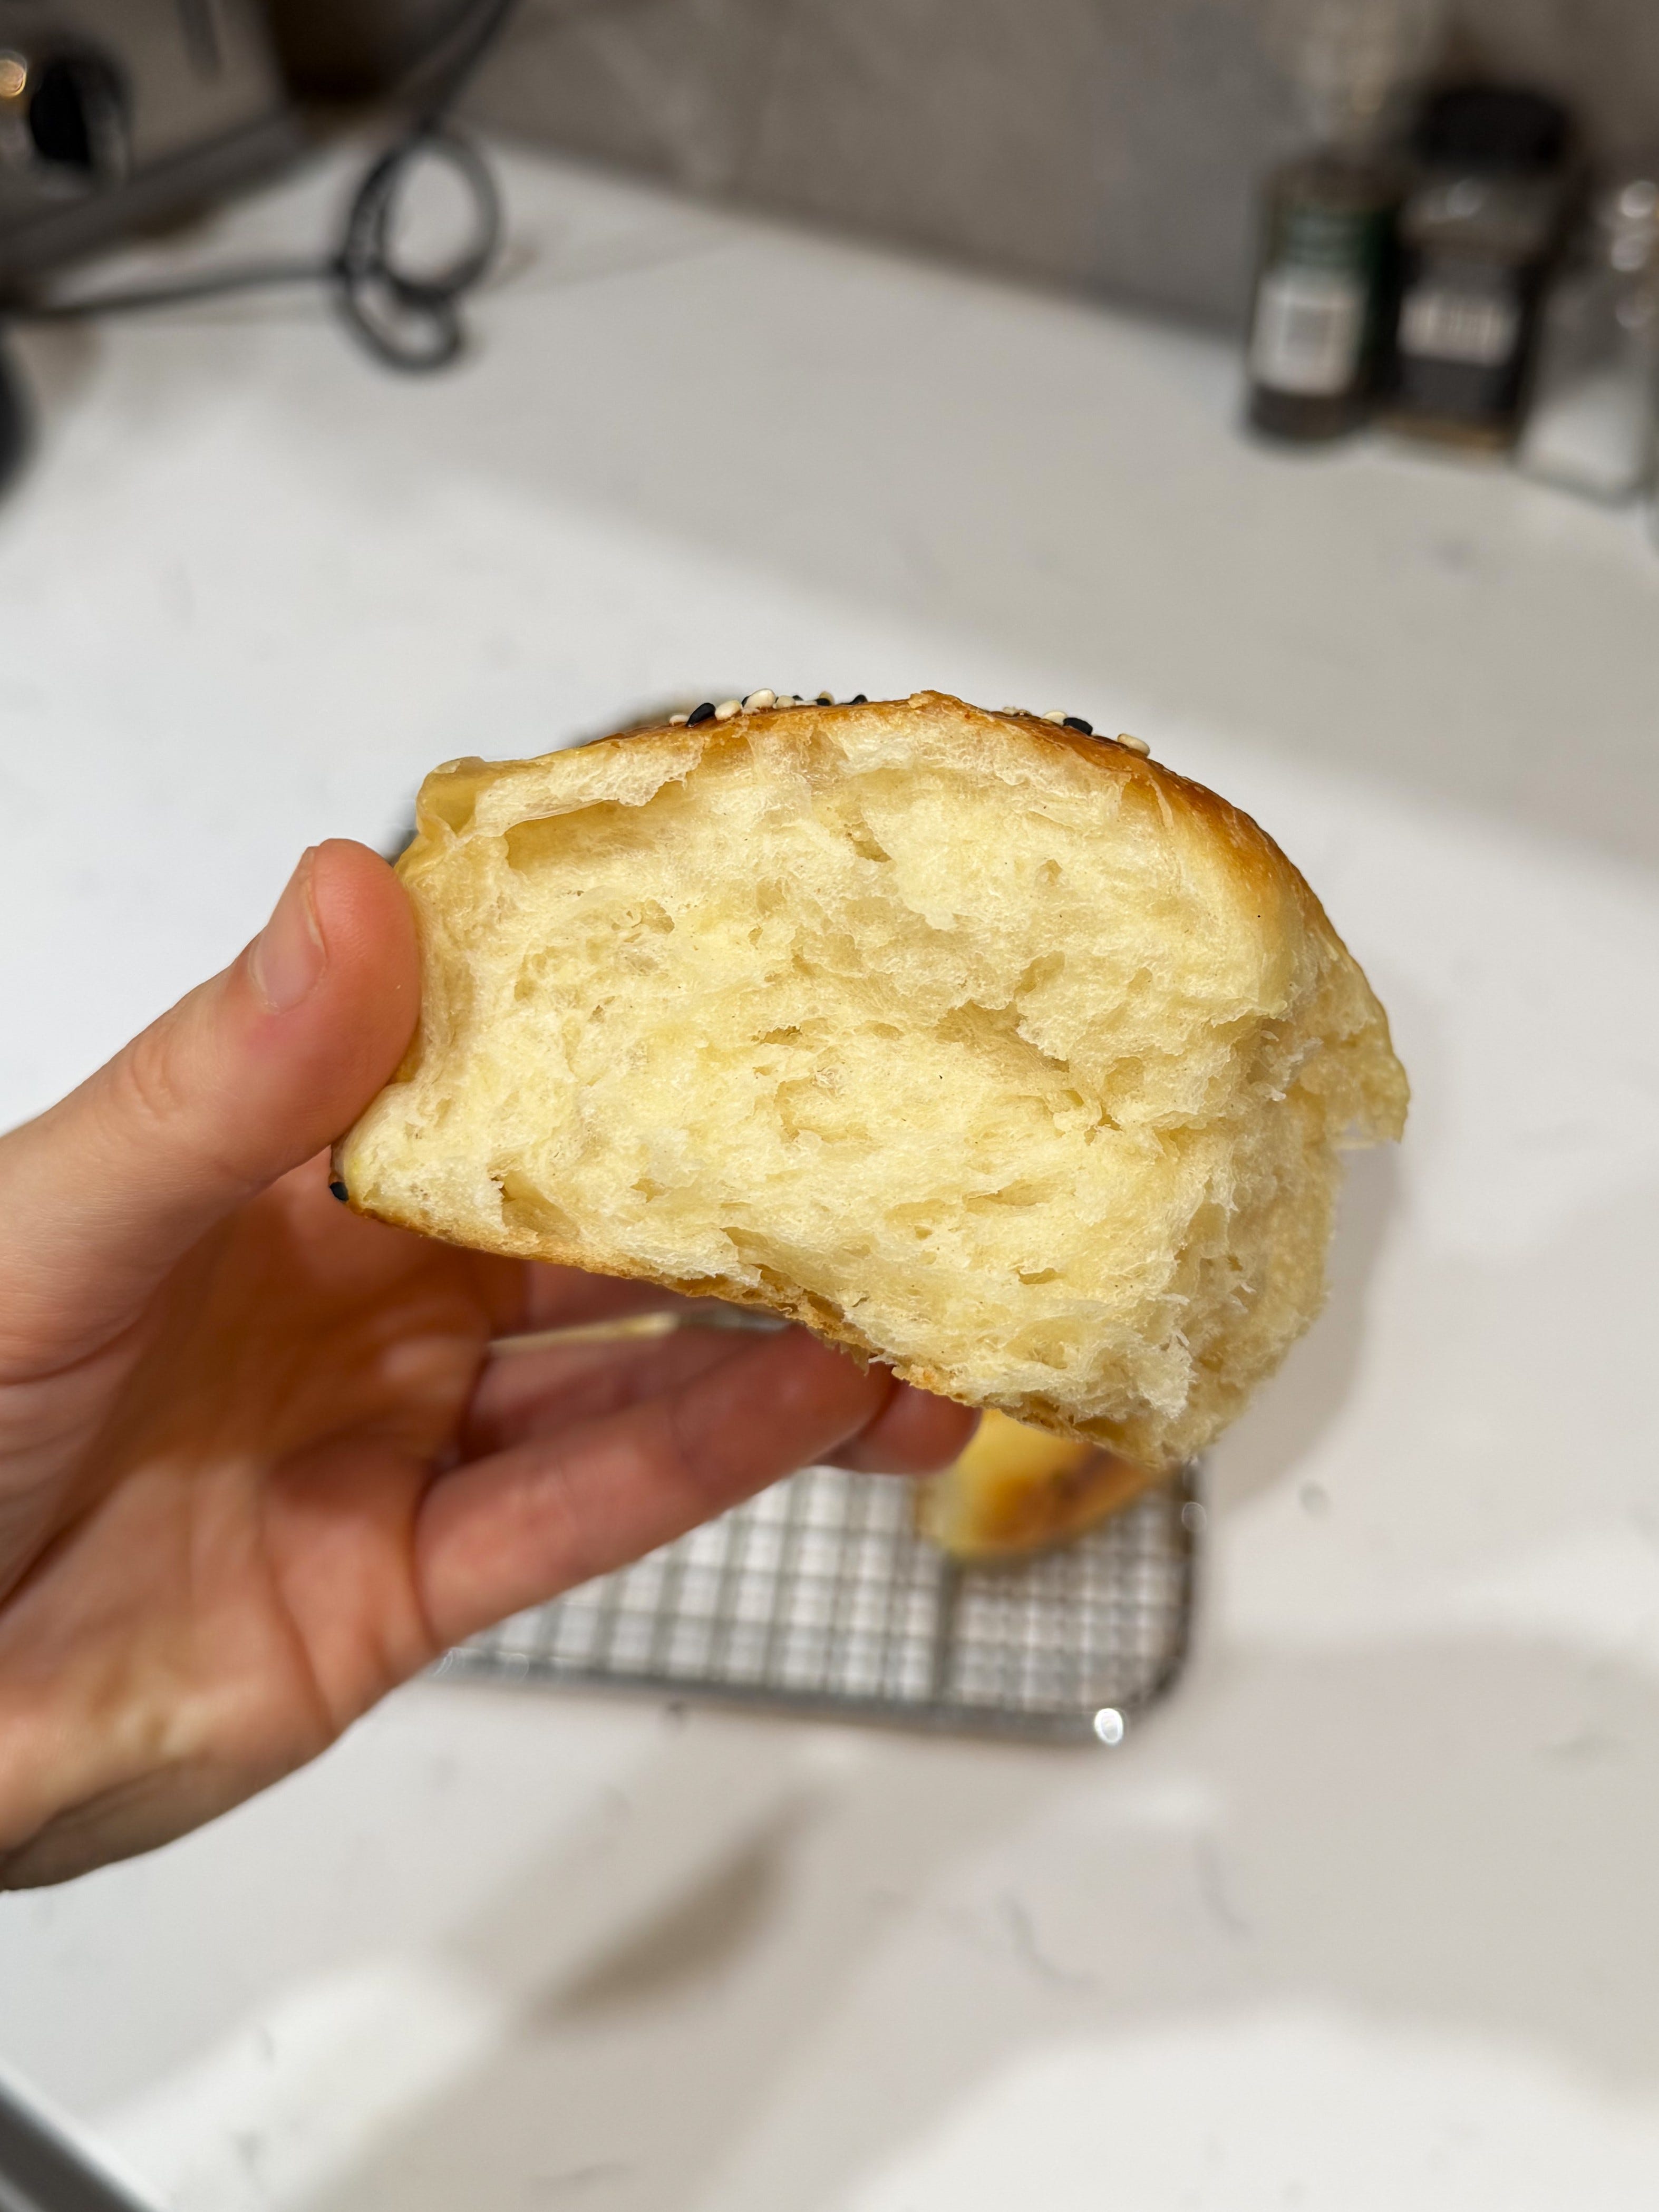
I’ve made çiçek ekmeği with this recipe three times now, and each one has been a fantastic success. The rolls are soft and plush. I would be happy to use them as a pillow if I was ever in need. It tastes a little rich from the milk, but not heavy. It has a depth of flavor from its overnight rise in the fridge. Time is bread’s biggest friend because it builds flavor in the dough. With just a few steps, I think it’s one of my easiest bread recipes yet.
When Bulut tried it, he said “This is so good. No notes.”
Neither of us had to become the stand mixer this time. But even if we had, it would’ve been worth it to see Bulut’s smile.

VIDEO TUTORIAL
By this point, I'm guessing you're interested in making bread at home.
You probably want to do it without a sourdough starter, in a way that fits your schedule, and with reliably delicious results.
That's exactly what the Bread Made Easy Workshop is for. You don't need any experience to join and you don't even need a stand mixer. We'll bake a loaf together as I teach you the principles behind bread. You'll leave knowing why bread works the way it does, giving you more confidence and ease in tackling any recipe.
One participant from last month's workshop put it this way: "You were FANTASTIC! I'm so proud of the loaf I produced, and it was made possible by your guidance."
Spots are limited to keep the group small enough for real feedback. The next workshop is coming in September. You can join the waitlist here, and I'll share mo details soon. 😊
Çiçek Ekmeği: Turkish Flower Bread
Servings: 8 large rolls
Ingredients
400 grams all-purpose flour (~11.5% protein, see Note 1)
Plus extra flour for dusting
5 grams instant yeast (1.5 teaspoons)
9 grams salt (1.5-2 teaspoons, depending on the type of salt you use)
12 grams granulated sugar (1 tablespoon)
180 ml warm water (3/4 cup) (~80-90 F/ ~27-32 C)
120 ml warm whole milk (1/2 cup) (~80-90 F/ ~27-32 C)
21 grams butter, melted and cooled (1.5 tablespoons)
For the egg wash
1 egg
1 teaspoon sesame seeds
1 teaspoon nigella seeds (or sub with black sesame)
Other materials:
Parchment paper, plastic wrap & oil
Method
Please watch the video above for visual guidance!
Mix together the dough: In a large bowl, whisk together the flour, instant yeast, salt, and sugar. Then add the water, milk, and butter. Mix well until it forms a cohesive mass. Scrape down the sides of the bowl with a silicone spatula, and use the spatula to fold the dough over itself a few times to ensure it’s evenly mixed. Cover the bowl with an airtight lid or plastic wrap and set a timer for 15 minutes.
Stretch and fold, then cold ferment: After 15 minutes, use a damp hand to do one set of stretch and folds (see video for guidance). Then cover the bowl and leave it in the fridge for 10-24 hours. The exact time isn't critical, anywhere in that window works. This slow, cold rise gives the dough time to build flavor as the yeast slowly ferments the sugars in the flour.
Prep your pan and work surface: When ready to bake, line a sheet pan with parchment paper and lightly brush the paper with oil. (See Note 2 for pan alternatives.) Lightly flour a clean work surface.
Shape the dough: Take your dough out of the fridge and dump it out onto the lightly floured work surface. Then cut it into 8 pieces. I like to weigh my pieces to make sure they’re relatively even (each should be 90-92 grams). One by one, lightly flour each piece of dough and pinch it together to form a pouch. Then roll it in a circular motion on the countertop to shape it into a ball. Place one dough ball in the center of the prepared baking pan. Arrange the remaining dough balls around it, touching each other, to form the flower shape. They will be a bit snug.
Proof (aka second rise): Lightly brush a piece of plastic wrap with oil and gently set it on top of the shaped dough. Let it rise for 40 minutes if your kitchen is 74-78 F (or up to 70 minutes if your kitchen is below 70 F).
Preheat the oven and egg wash: When 15 minutes remain in proofing time, preheat your oven to 400 F (200 C). The dough should look puffier, but not doubled in volume. Beat an egg and gently brush it over your dough. Sprinkle with sesame seeds and nigella seeds.
Bake: Bake for ~20 minutes. It should be deeply golden and an instant thermometer inserted into the center roll should read 200-205 F. Use a spatula to immediately move the bread onto a cooling rack and let cool for at least 30 minutes before digging in. Enjoy!

You might also enjoy my other no-knead bread recipes!
Bazlama (Fluffy Turkish Flatbread)
Ramazan Pidesi (Turkish Ramadan Bread)
Everything-bagel-spiced Focaccia
Challah and cinnamon rolls from one dough! (This one requires 2 minutes of kneading)
Liked this recipe? Then give me some love 😊
Thanks so much for reading! This post was probably finished at 2am, tested in multiple kitchens, and overthought to an embarrassing degree—all so you can make something delicious. My recipes are free, but if you want to support my morale, you can:
❤️ Drop a heart below - it’s free and easy and feels like receiving a virtual hug so thank you!
💬 Leave me a comment - I love chatting with you! I read and respond to all of them.
➡️ Share or re-stack this post so other people can find it - help me achieve my dream of becoming everyone's internet cooking friend
😍 Become a free subscriber (no paid tier exists yet, so this is literally the VIP option)
I really appreciate it. I’m so glad you’re here! 💞
Notes
(1) Flour: I use King Arthur all-purpose flour or Kirkland Organic all-purpose flour. Both of these are around 11.5% protein content. The protein content in your flour will have an impact on the outcome of your bread! If you use a different brand of all-purpose or plain flour, it might turn out less moist and fluffy. If you use bread flour, which usually has 12-13% protein content, you might need to add a little more water.
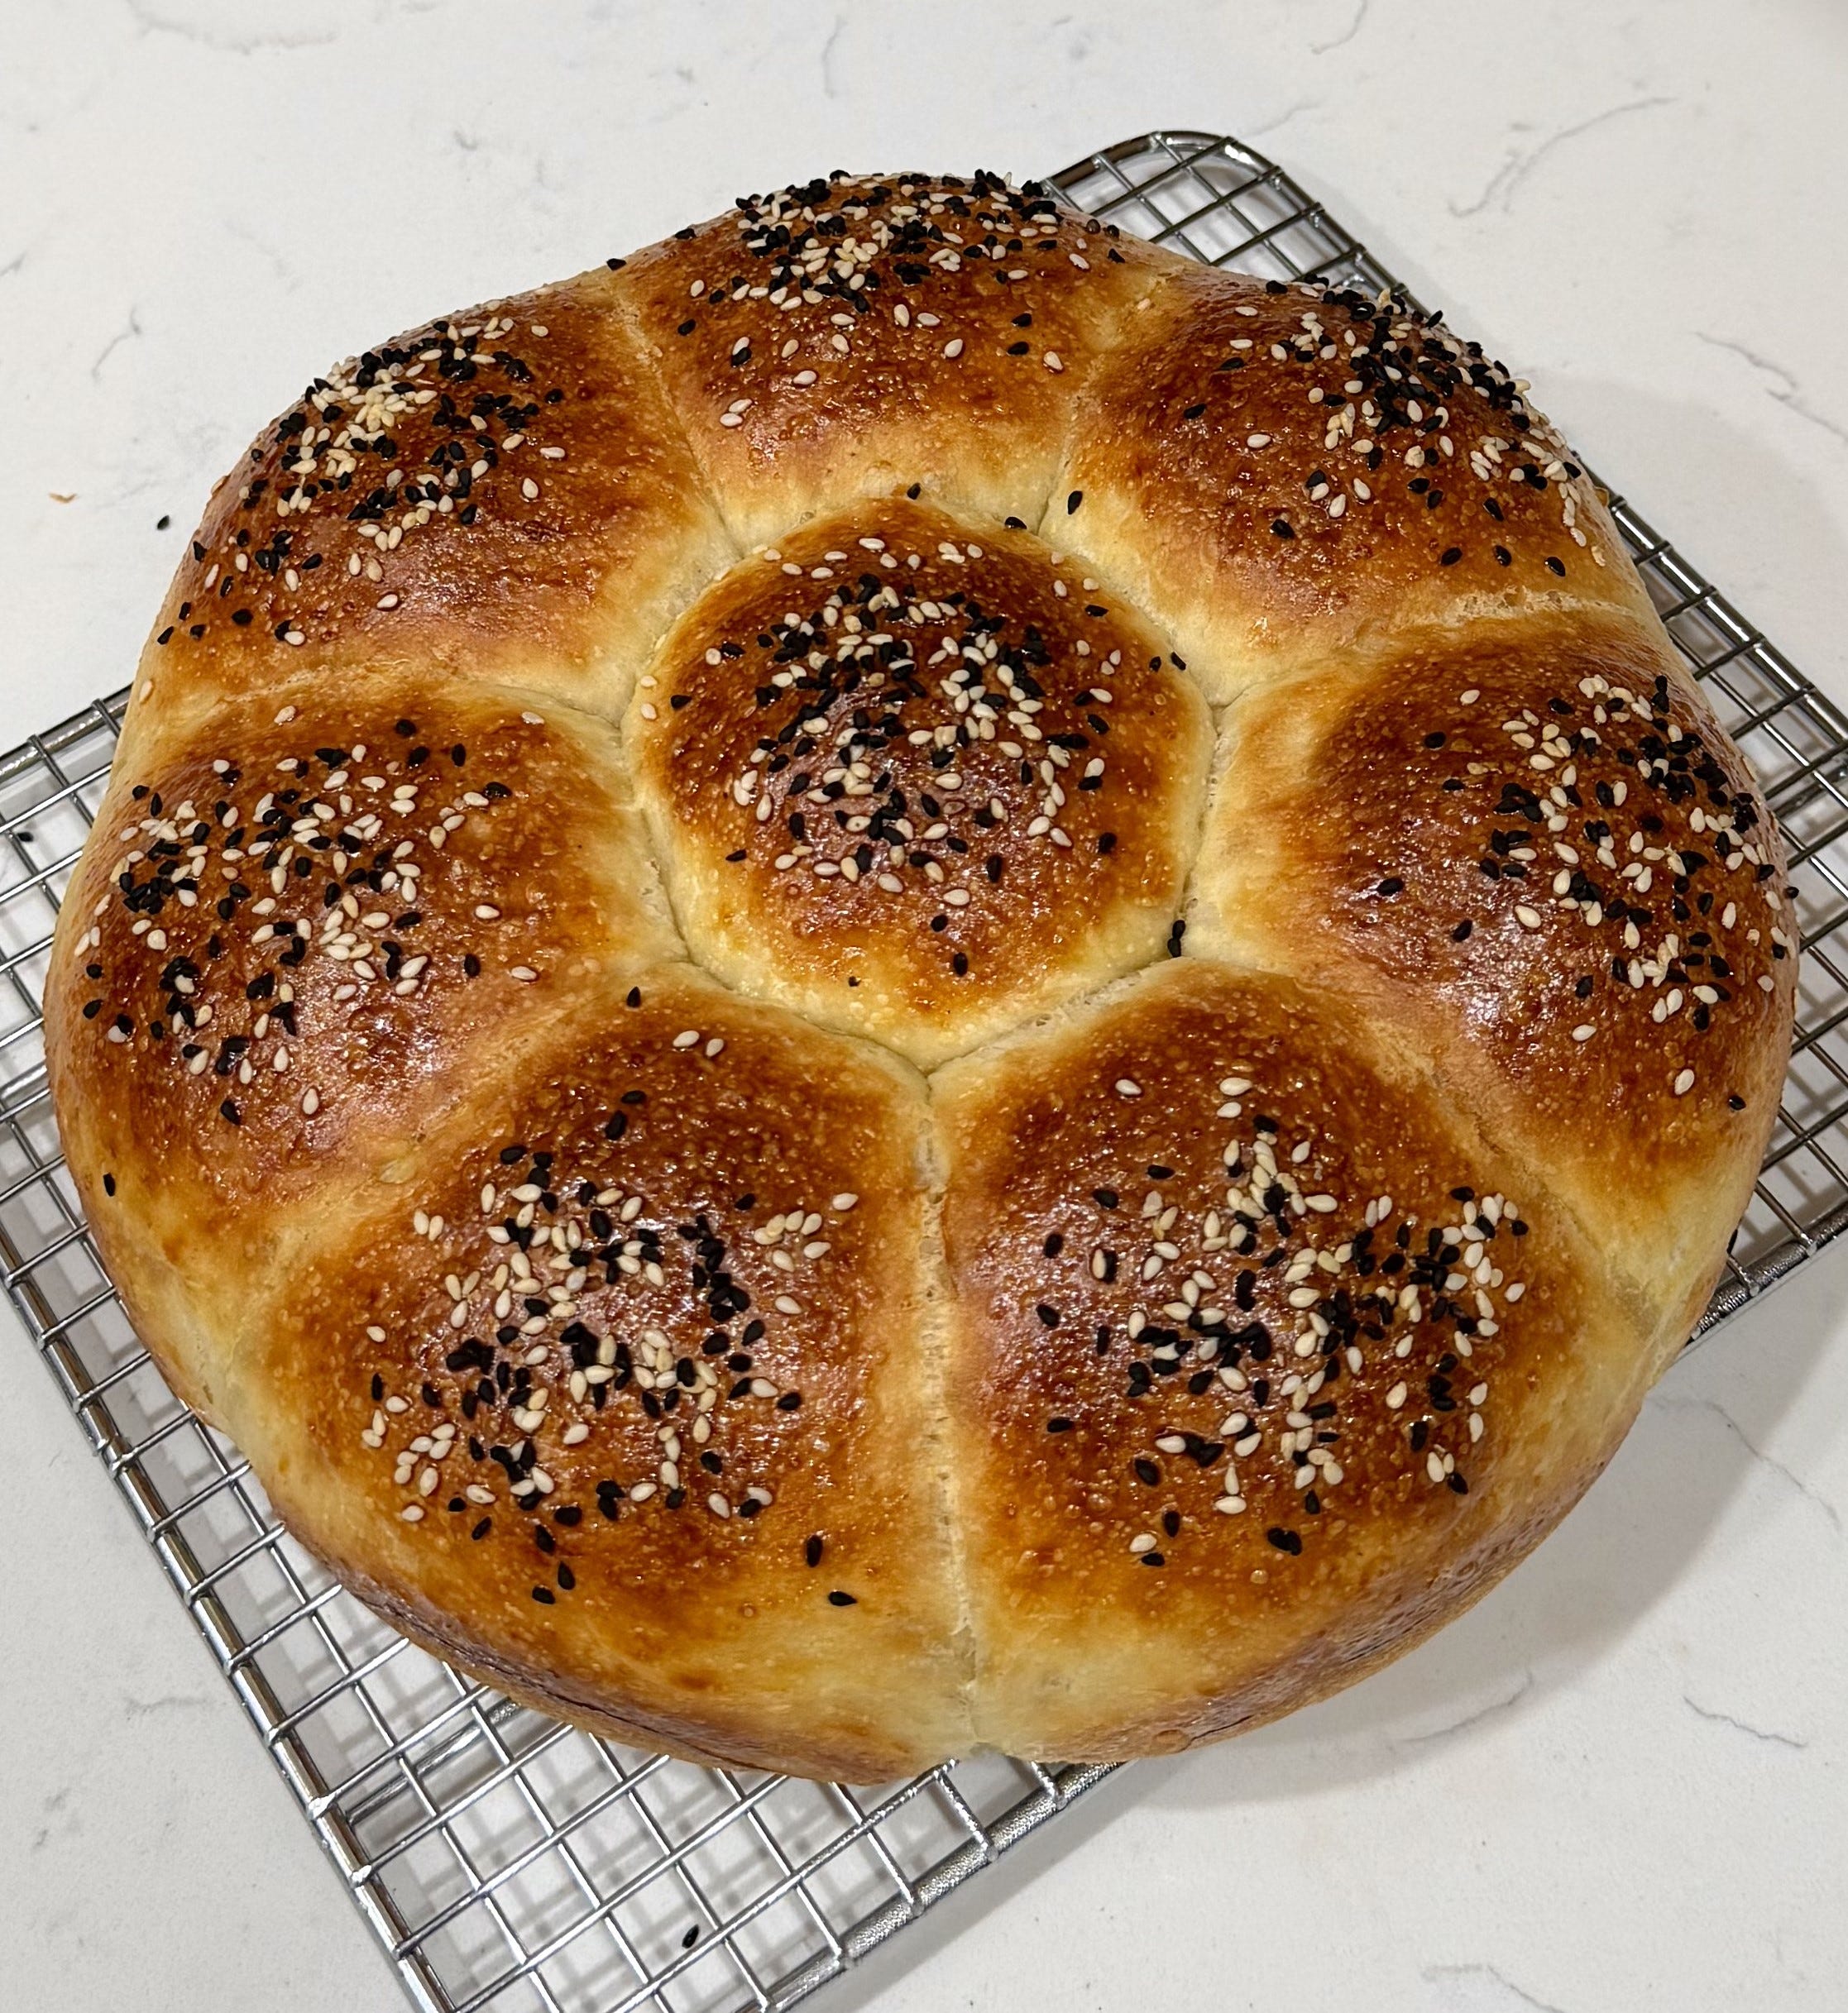
(2) Pans: Instead of a sheet pan, you could arrange the dough in a 9 or 10 inch circular baking pan (like a cake pan or a springform). If the pan is nonstick, just lightly brush it with oil. If the pan is not nonstick, then line it with parchment paper and then brush the paper with a bit of oil. When baking in a circular pan, it will have slightly less distinctive “petals”:
(2) Storage: Store the cooled bread in an airtight plastic bag. The dough keeps well for up to a day at room temperature. Past that, I recommend breaking the rolls apart into individual pieces, placing them back into the plastic bag, and freezing. To reheat, you can thaw each piece (or several) overnight in the fridge, on the counter for 45 minutes, or in an oven for 7-10 minutes at 350 F/180 C.
Omg Leslie I was totally massaging my ear lobe as I read this! 😂
Looking forward to making this! Thank you
Your stories are so entertaining and this time humorous. This bread is so pretty and inviting. .. something that I will try.