

The Easiest Bread Recipe that Google Won’t Tell You About
The bread recipe that actually works for first-timers and tastes unbelievably delicious

Hi, I’m so glad you’ve stopped by. I’m Leslie, an enthusiastic cook and vagabond who loves making homestyle dishes from around the world.
If you enjoy this post, it would mean so much to me if you’d subscribe and click the ❤️ button at the bottom of the post. I read and respond to all comments, so if you have any thoughts or feedback, I’d love to know!
Scroll down to get right to the recipe & video tutorial.
Hello friends! If you’re new here, welcome 🙂—I’m guessing you found me through my recent post about Incredible Cinnamon Rolls and Challah from One Simple Dough. That recipe got so much love that it made me realize: people are hungry for easy bread recipes that actually work.
Today, I’m sharing my absolute favorite beginner bread recipe. This was my gateway bread—the one that convinced me to stop watching YouTube videos and actually get in the kitchen to bake something. It’s also the recipe I recommend to anyone who’s never touched a packet of yeast in their life.
Well, it’s the recipe I would recommend if anyone in real life actually asked me about bread baking. Sadly, none of my IRL friends have asked me this question, but more on that later, when I tell you about how I forced encouraged my brother’s girlfriend to make this bread.
Why the internet is wrong about the easiest bread
Search Google or ask ChatGPT for the easiest bread recipe, and you’ll get the same answer every time: no-knead artisan loaf. The SEO algorithms and AI models have crowned a winner.
But don’t believe everything you read on the internet. They’re wrong on this one. And I’m here to prove it.
The best bread recipe for an absolute beginner is overnight focaccia. Here’s why.
Like artisan bread, it’s no-knead and uses simple ingredients - flour, instant yeast, water, salt, and olive oil (and butter for greasing if your pan isn’t nonstick). But unlike artisan bread, it’s actually easy to make.
No special equipment required - no stand mixer and no Dutch oven. You can bake it in a square pan, a pie plate, two loaf pans, even muffin tins to make little cutie focaccia muffins. Also, the pans can be glass or metal, whatever you have.
Zero shaping required. You do one set of stretch and folds, but that’s just for gluten development and structure, not to achieve some perfect shape. The dough will still be blob-like after, and it’s meant to be that way.
No stressing over rise times or whether it’s “doubled in size.” You mix it, stick it in your fridge for 18-72 hours, then take it out a few hours before you want to bake. You can literally make it ANY time in that 54-hour window. You’re not looking for a certain sign. It’s whatever works best for your life.
Everything happens in one bowl - and no mess because you don’t have to work dough on your countertop. Small kitchen people, rejoice!
No preheating pans. Yay! Less risk of burning yourself.
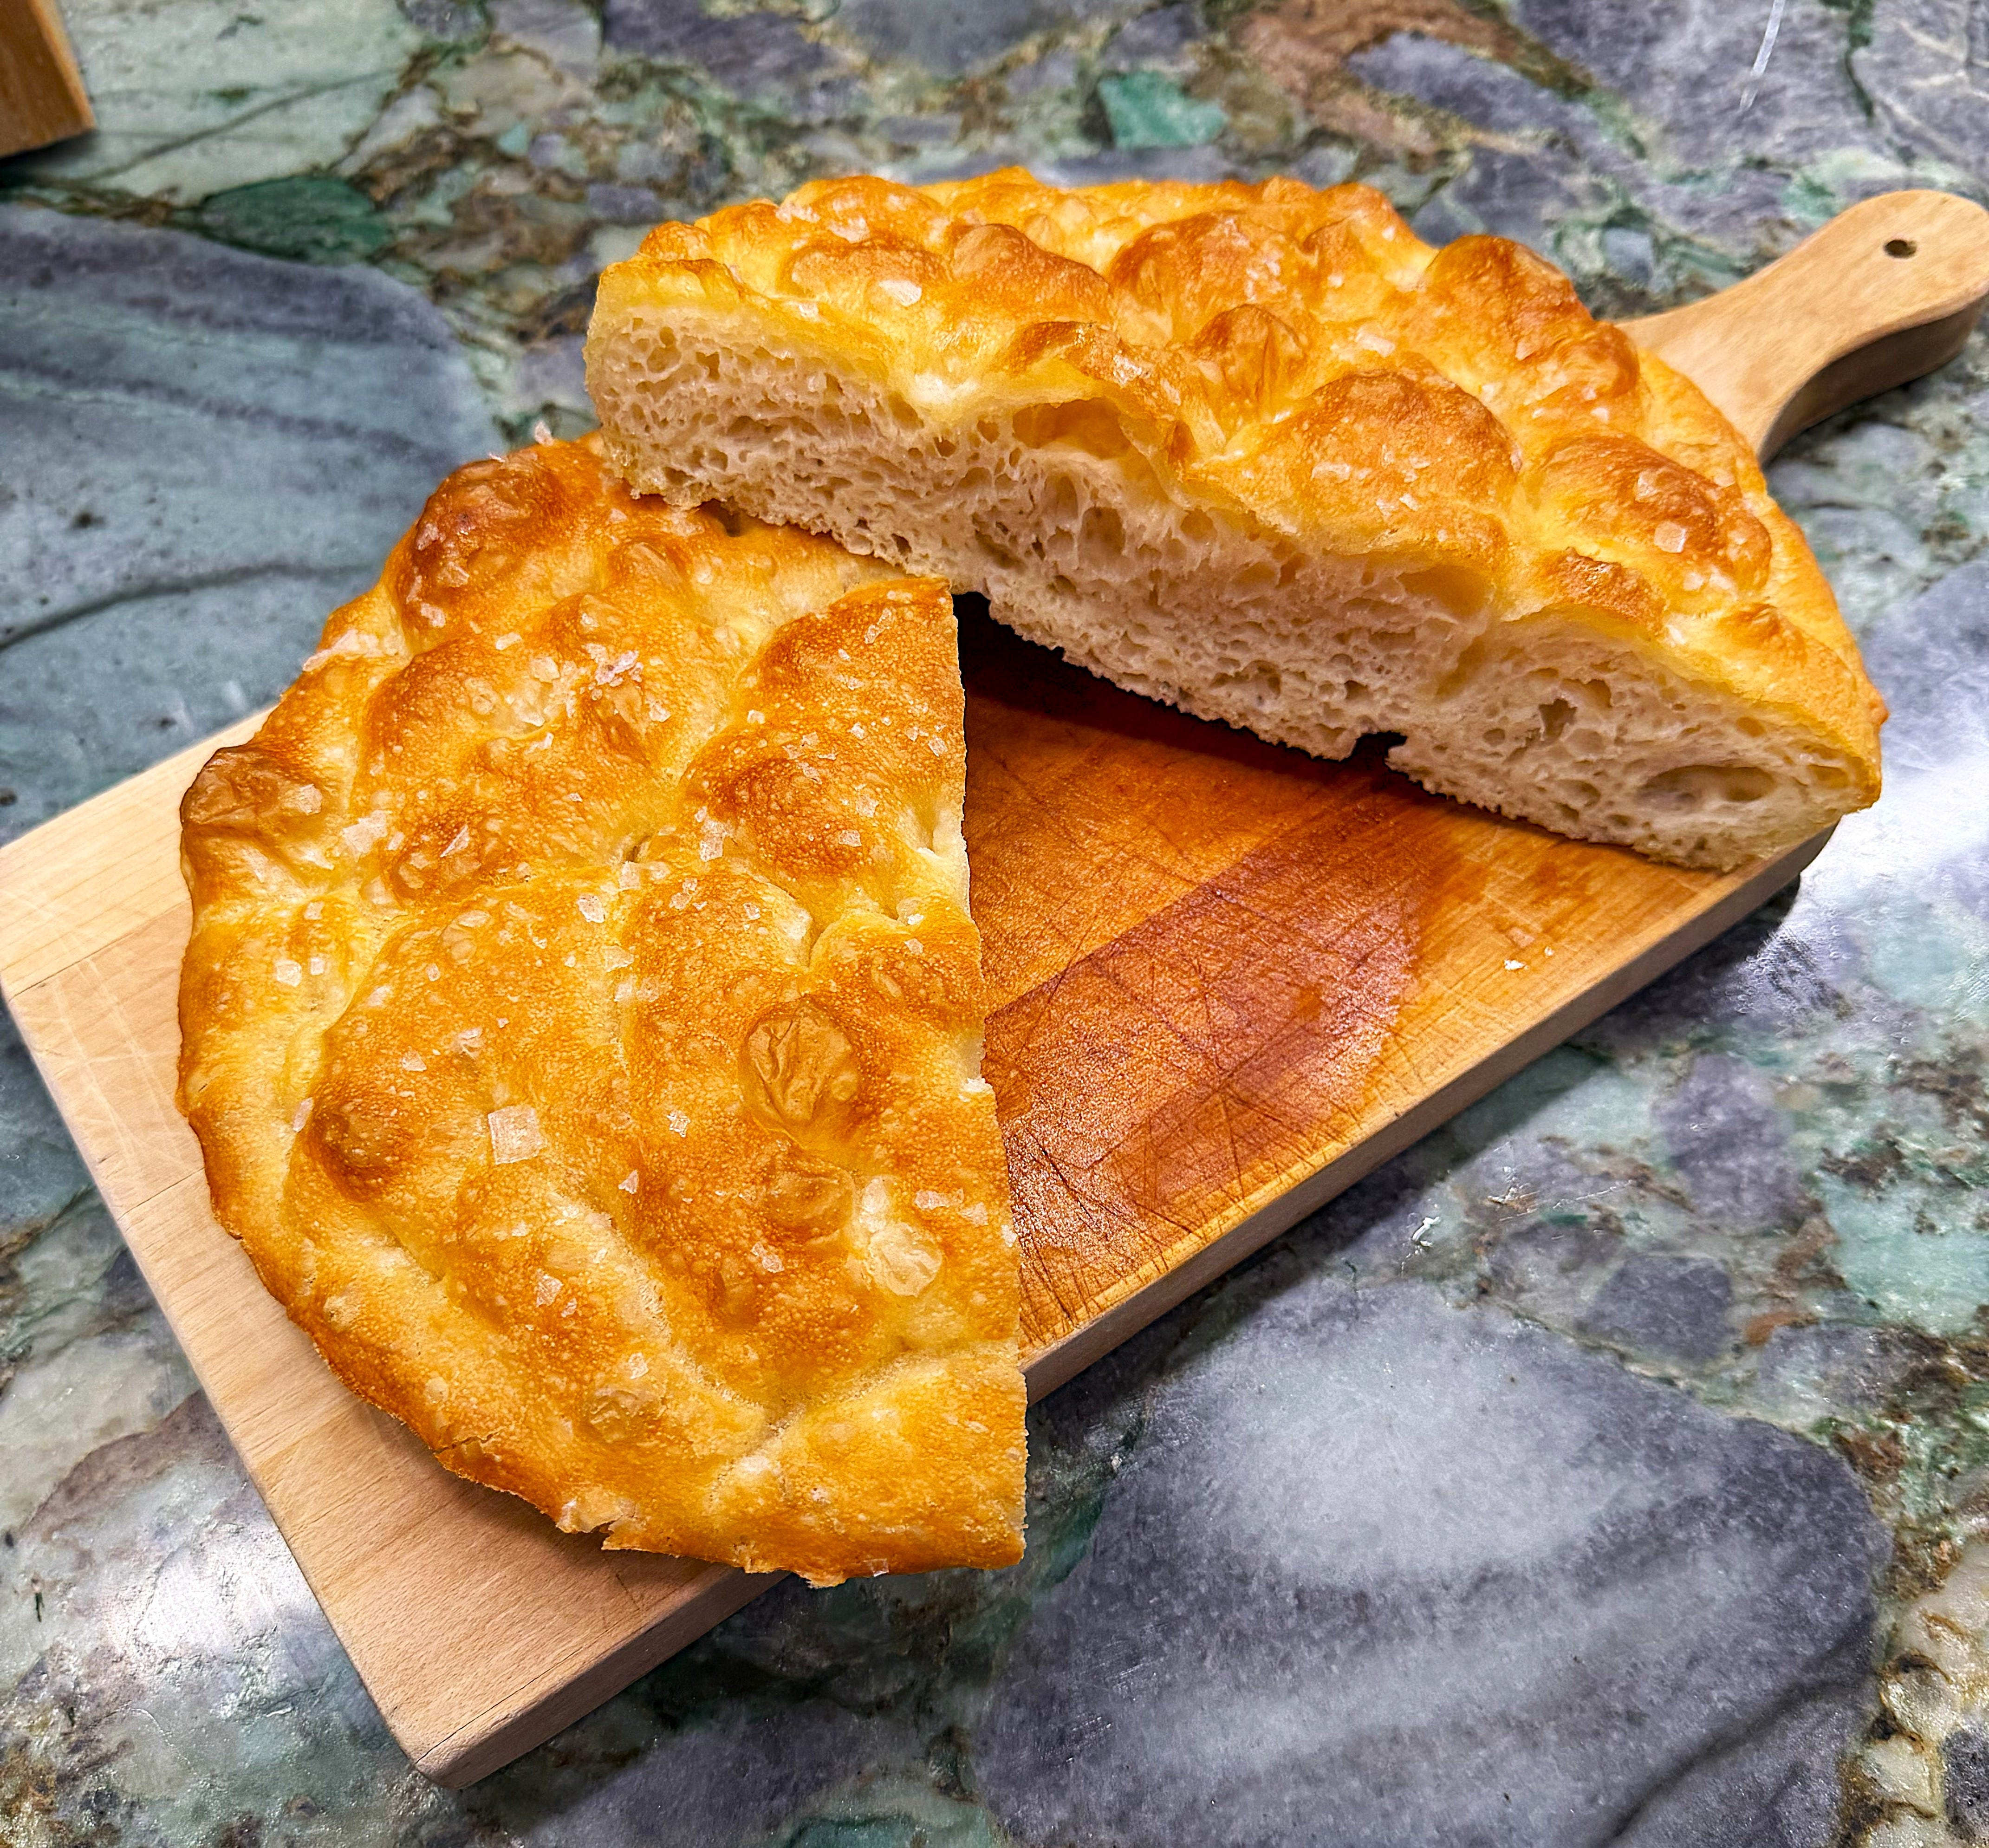
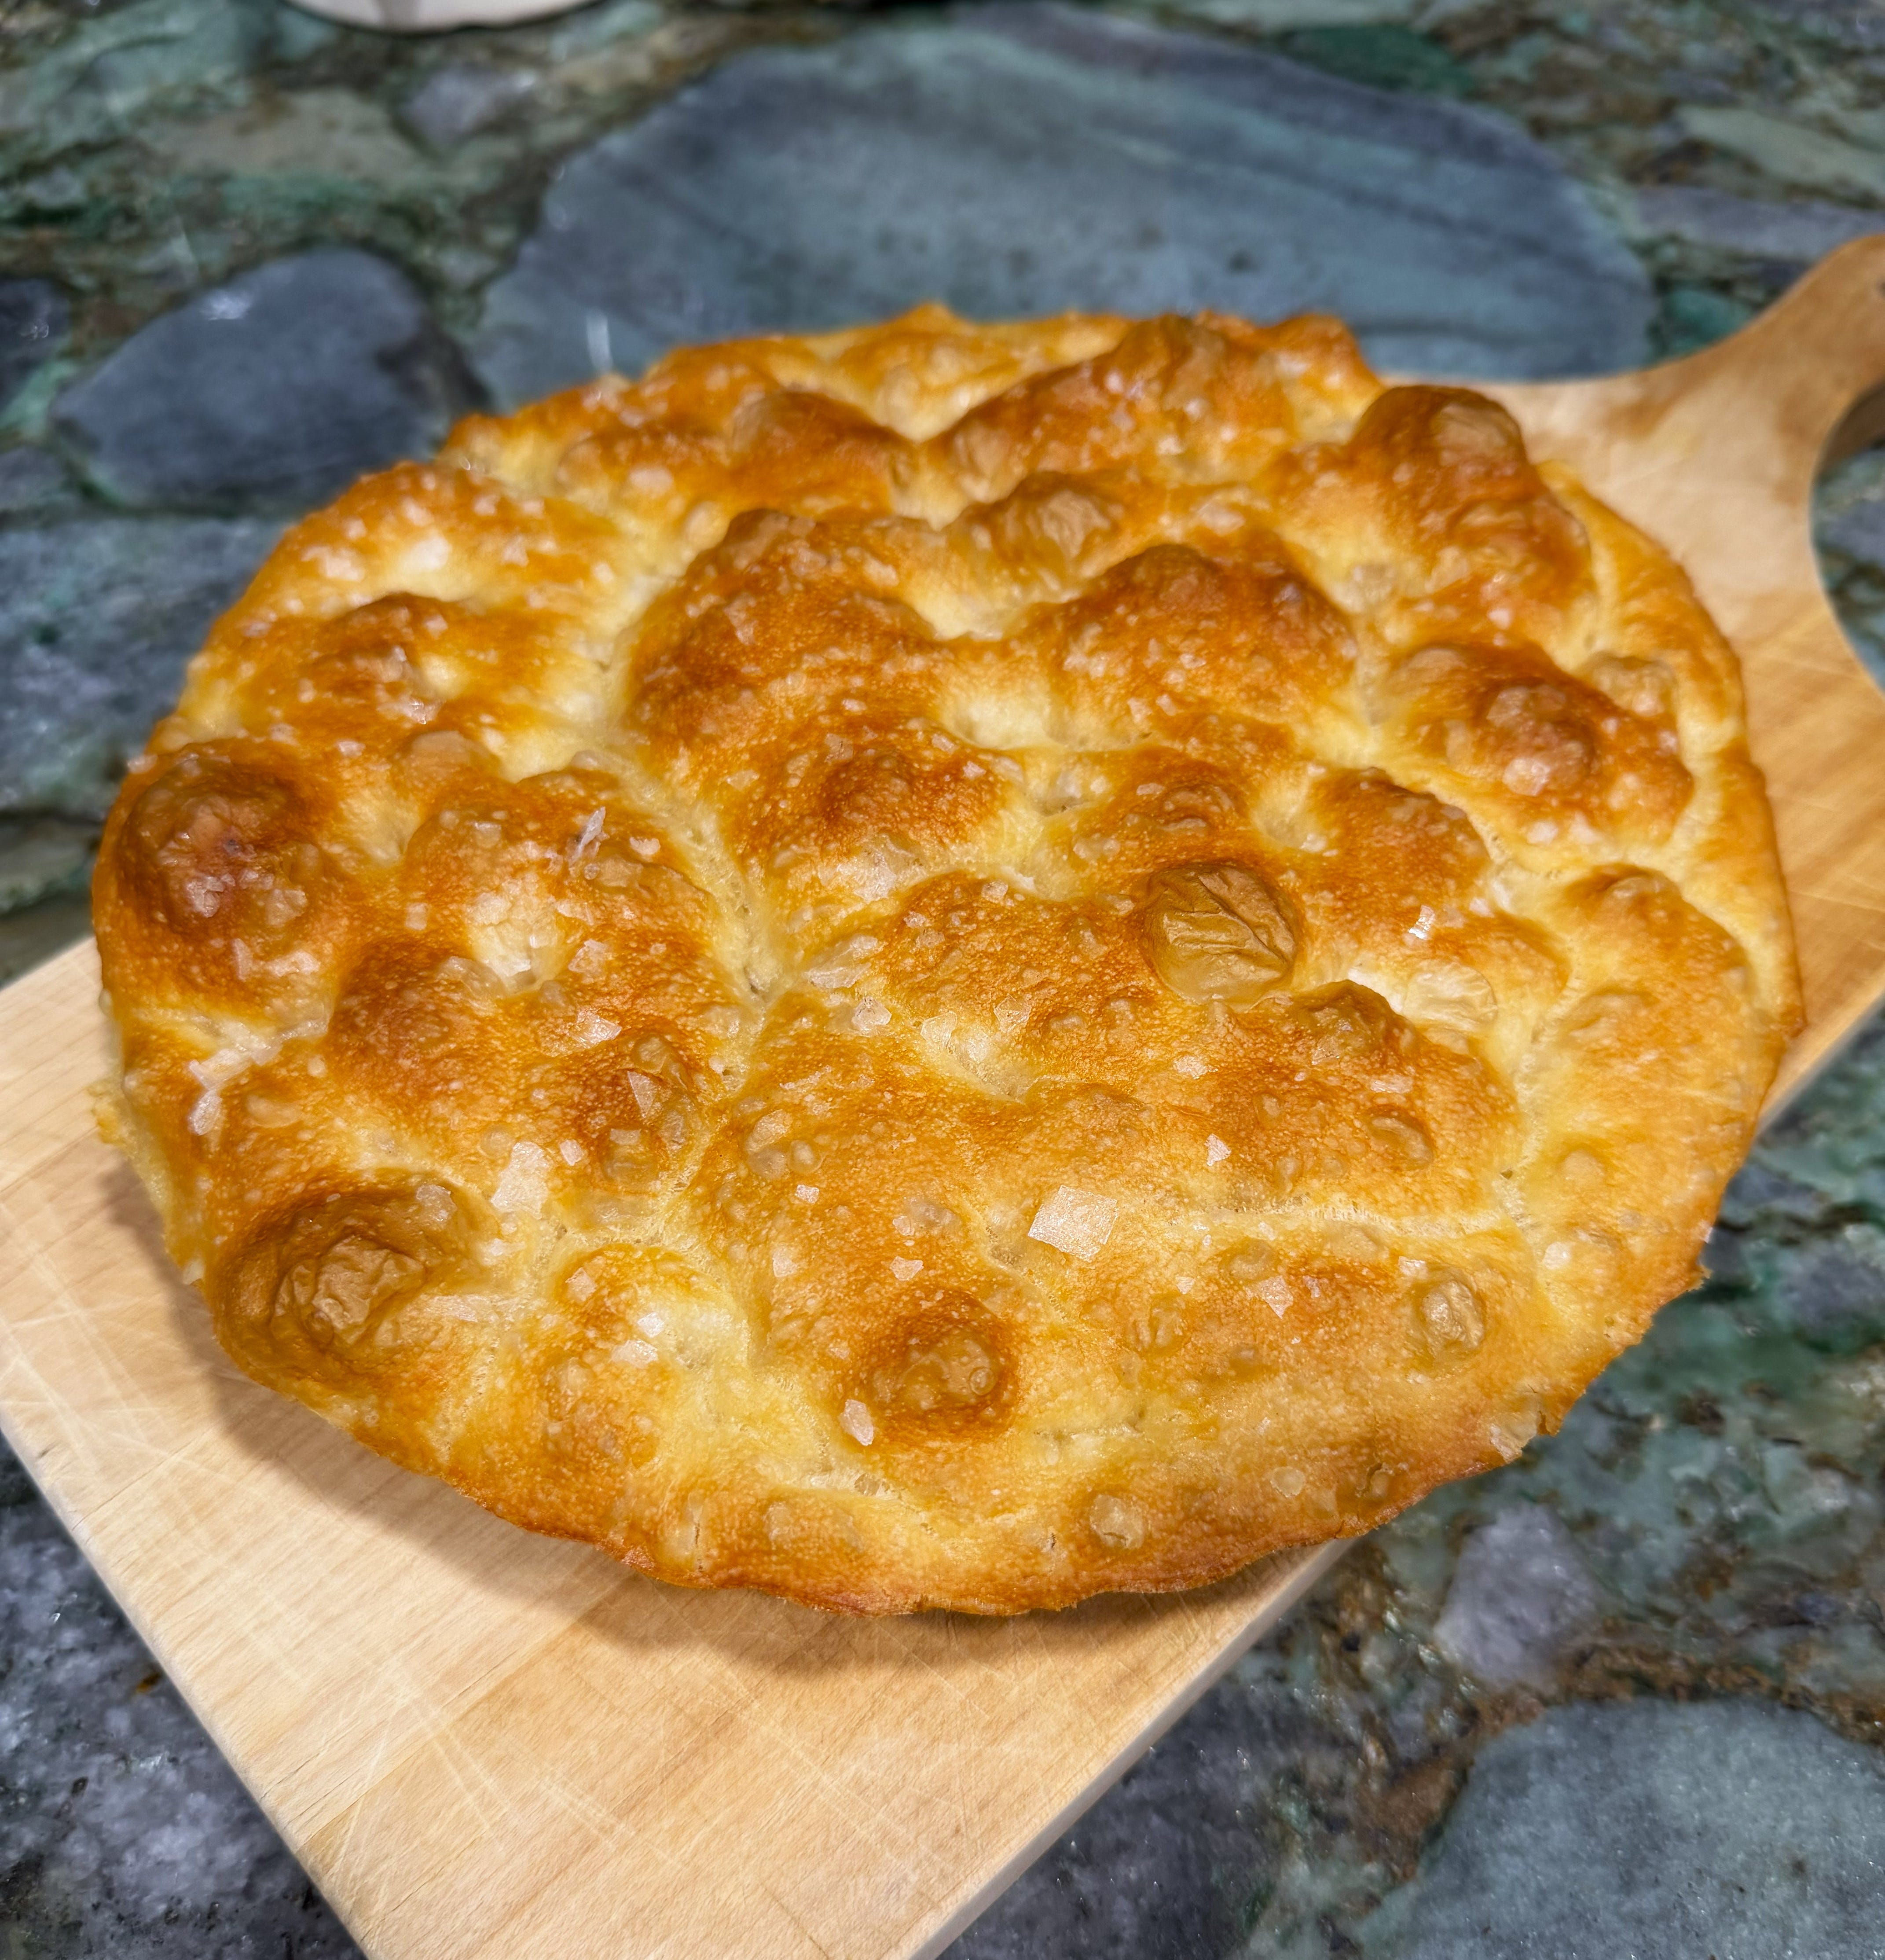
And if you’re a results over process person, I have great news. This recipe gives you a wonderful bread with golden, olive-oil-crispy edges and a pillowy, moist center. I’ve only had one other focaccia in the US that rivaled this one… and honestly, it’s just as delicious as a lot of the bread I ate in Italy!
I swear by Alexandra Stafford’s Overnight Focaccia recipe. She has a ton of notes from her own experience and from audience feedback. I’m sharing my simplified and scaled down version of her recipe below.
I also have a video tutorial below so you know exactly what each step of the recipe looks like!
The no-knead artisan loaf still asks too much of the absolute bread beginner
Now, you might be wondering: why NOT artisan bread? It’s no-knead, it uses simple ingredients - what’s the problem?
The problem is everything else.
First, the artisan loaf lacks consistency. When I made the artisan loaf, my socks weren’t knocked off. It was too spongey and dense for my taste. Maybe I did something wrong (I don’t think so). I could try it again. But frankly, I don’t want to because 1) I love the overnight focaccia and 2) the artisan loaf has too many demands and dangers for the novice bread maker.
The artisan loaf requires:
A Dutch oven. I actually bought a Dutch oven to make a no-knead artisan loaf, and I’m a little sad I did.
Eyeballing when the dough has “doubled in size.” I often think to myself “well, I think it has doubled, but I can’t remember what size it was before, and I’m not sure how to even gauge what doubled is in terms of the volume of space this blob of dough takes up in this bowl so WTAF am I doing here?!” This is not a nice situation to put a beginner bread maker in.
Moving the dough onto your counter. Small kitchen friends feel me on this— it can be challenging and messy when you only have 3 square feet of counter space. And even if you have a lot of room, it’s not exactly fun to clean a counter covered in flour.
Shaping the dough. A sticky blob of dough is intimidating. I barely touched it, and now half of the dough is on my hands, and I have no idea how to get this monster of goo to resemble anything like a ball. In short, no first timer should have to wrestle with a sticky dough to tame it into any kind of shape.
Preheating the Dutch oven and remembering it’s blazing hot. You’re telling me I have to remember another step, then avoid burning myself with something that’s heated to the temperature of the sun’s surface? Perhaps a personal hang-up, but I can’t be the only one with Dutch oven anxiety.
Removing the top of the Dutch oven midway through baking. Yes, I understand why this is necessary — to help your bread get a nice crust. Yet, it presents another risk of burning myself, which I frankly don’t care to suggest to others on their first attempt at baking bread, thank you very much.
Focaccia, on the other hand? None of these problems. It’s a beautiful bread that doesn’t require wrestling with sticky dough or fear of third-degree burns.
My experience with this Overnight Focaccia
I must warn you. This is a gateway bread. When I first made it, I couldn’t believe how good it was. Pillowy soft, and buttery-tasting from the olive oil with a thin chewy crust. I was hooked. It gave me the confidence to try other bread recipes, too. By now, I’ve made it at least a dozen times in different kitchens with different equipment and climates. It works every single time.


Even with my ventures into other easy bread recipes, this focaccia is still the easiest of them all. For minimal effort and skill, it produces amazing results.
And I shamelessly believe that anyone can succeed at making it.
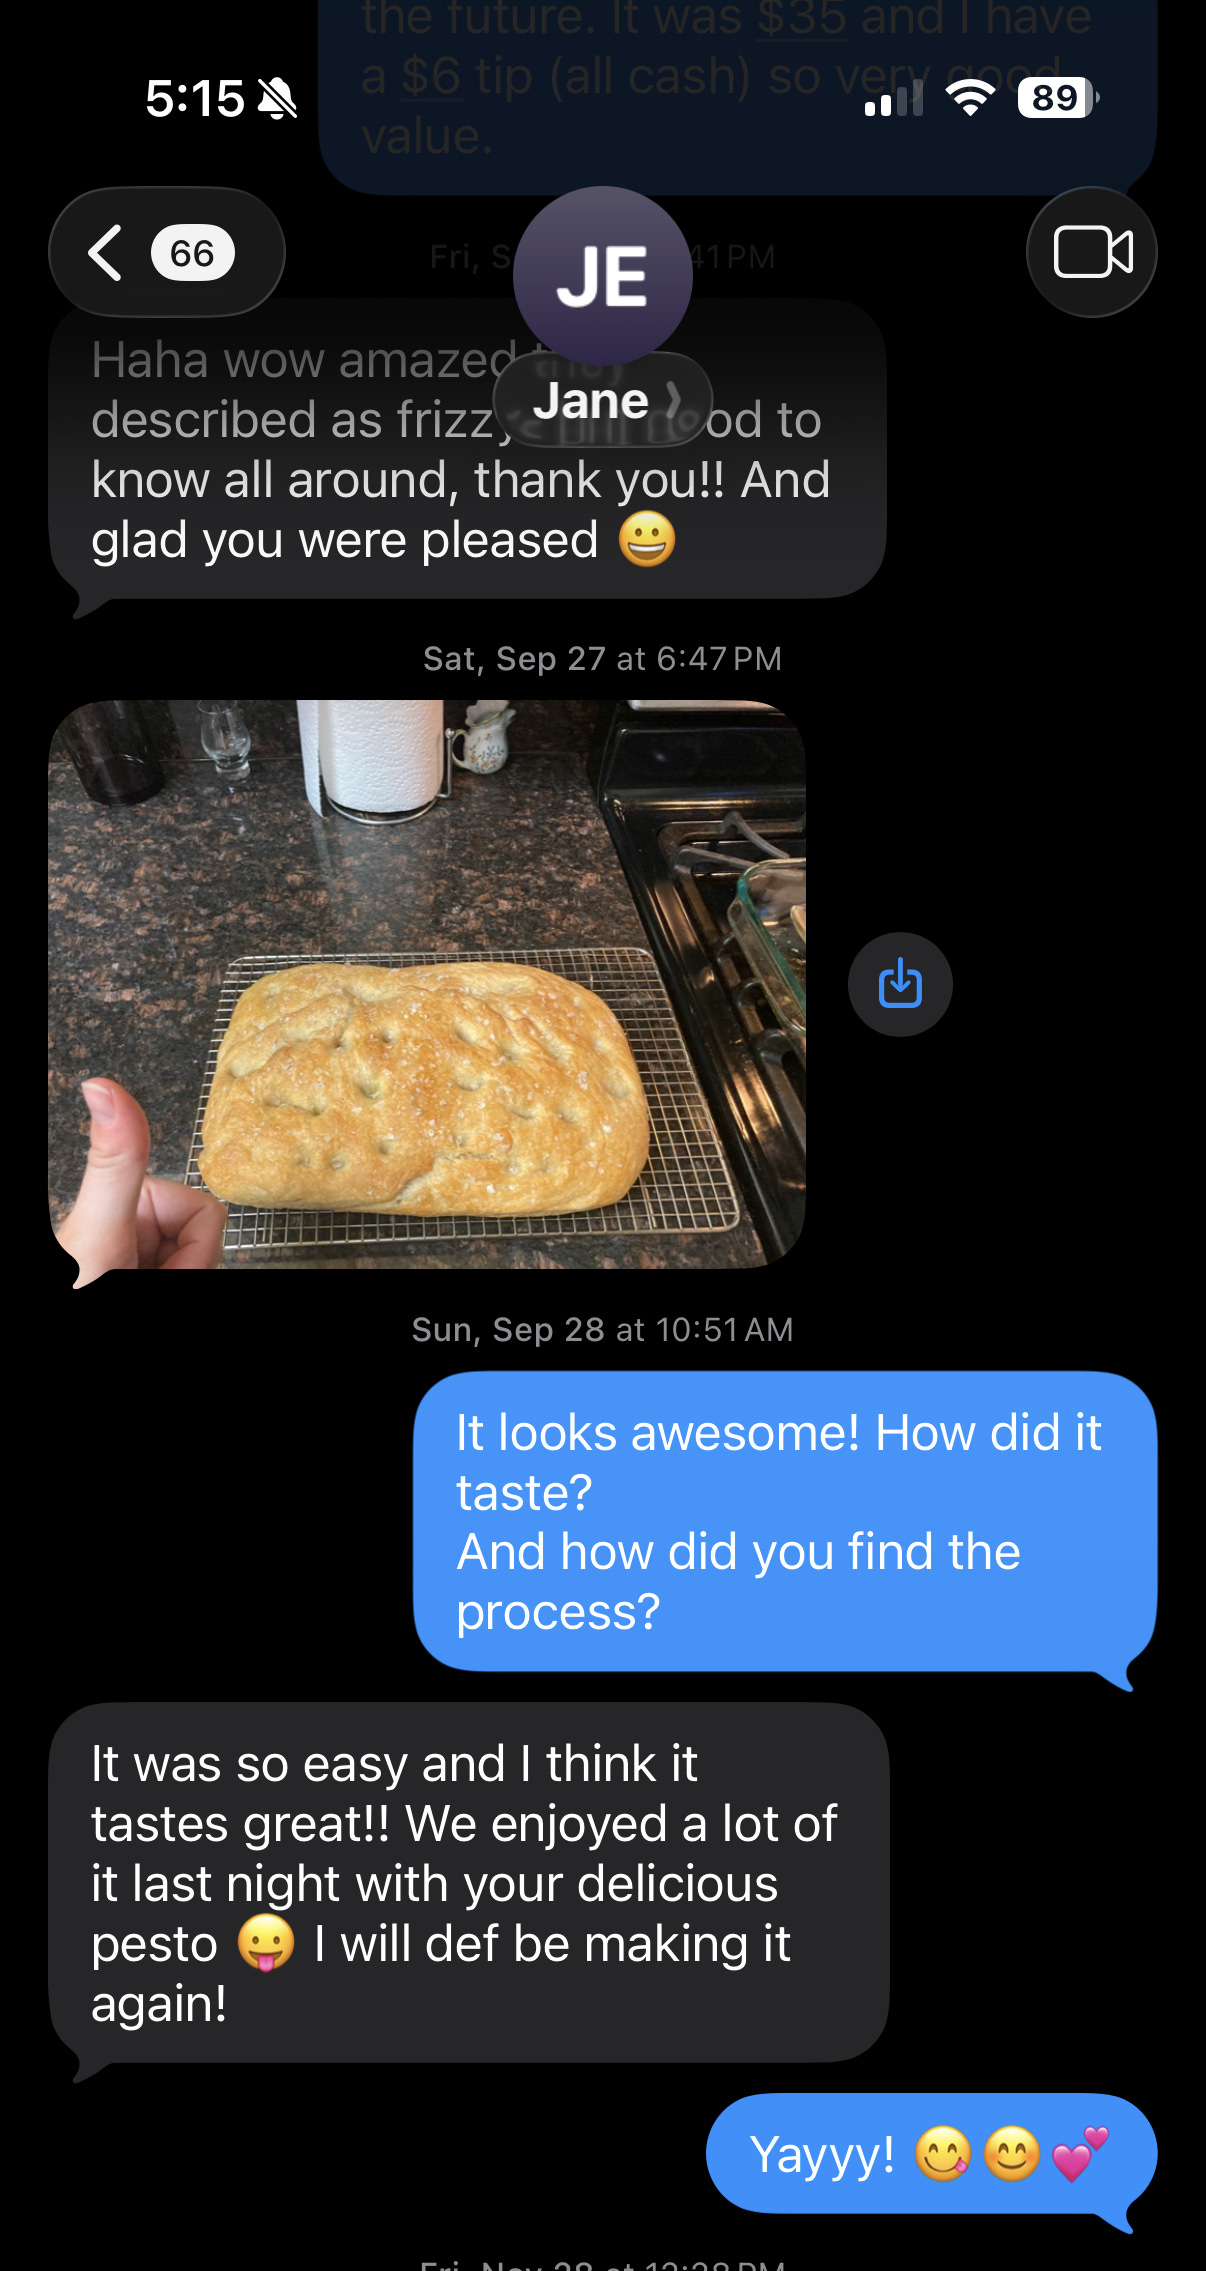
Last September, my husband and I took care of my brother and his girlfriend’s dog while they were out of town on vacation. Upon their return home, I suggested that I teach Jane (my brother’s girlfriend) how to make this focaccia. Why? I don’t know. I just love trying to awake the dormant love of breadmaking in others, I guess. Also, Jane enjoys cooking and baking so I thought she’d be a good recruit… er I mean student.
Well, Jane is a great sport, and she agreed. Now, keep in mind that Jane had just been on like 12 hours of flights across the Atlantic, which she was recuperating from, but still, for some reason, I thought “this is a perfectly good time to teach Jane how to make focaccia from scratch.” We mixed together the ingredients for the dough and then put it in their fridge. I guess I didn’t think it through very well because at that point I had to leave (like for real, I was flying across the country). So I gave Jane the recipe and told her to fend for herself! (Just kidding, I told her to ask me if she had any questions.) And guess what? She nailed it.
I guess I’m a bread pusher, and I’m not ashamed of it. So please, let me push this bread on you. 🙂
A few other notes for beginner bread makers.
Make sure your yeast is not expired. I like to use instant yeast, which does not have to be bloomed first. Simply check the expiration date on the package, and make sure your yeast hasn’t been sitting in a very hot or humid environment.
Two inexpensive tools make baking easier. This recipe is so forgiving and I truly believe you don’t need any special equipment, but in general for baking, these two things help ensure you’re on the right track, and each costs under $15:
An instant-read thermometer - I use this to make sure that the water is in the right temperature range. Alexandra’s recipe explains exactly how to get lukewarm water without a thermometer, but I find a thermometer easier because I just microwave the water for 10-15 seconds increments and keep checking.
If you are unsure whether your bread is fully baked, you can use an instant-read thermometer to help. The outside of the bread can sometimes be a bit misleading — it can look brown, but the inside might not be done. Most breads should be between 190-210F. To measure the temperature, just stick the thermometer in the center at a slant so you can get an accurate reading without touching the bottom of your pan.
A kitchen scale - This is extremely useful to measure ingredients with more accuracy and also without the annoyance of using measuring cups.
Watch videos to understand what the dough should look like at each stage. This is also how I learned what a “stretch and fold” is. Scroll up to see my recipe tutorial!
You don’t need to understand everything to get started. Part of what held me back from baking bread for so long was feeling intimidated by all of the jargon. You don’t need to understand everything. You just need to understand enough to follow a recipe, and it will likely turn out fine.
“But, Leslie, I’m still worried it won’t work for me because yeast is SCARY”
I will say, this recipe has worked for me every time I’ve made it (probably a dozen times) in different kitchens with different equipment and climates. Nonetheless, baking bread might not work the first time.
What if it doesn’t work out? Well, like most things in life, do a little research and try again. Drop me a comment and I will do my best to troubleshoot with you. Or, take a photo of your bread, write down what you did, what the result was, and post it on the Breadit Subreddit to get help from people who probably know a lot more about troubleshooting bread than I do.
I’m curious to know - if you’re a beginner bread maker or just bread-curious, what’s holding you back from getting started? And if you’ve already made this focaccia (or try it after reading this), I’d love to hear how it went!
If you have any questions or think I’m totally wrong and there is a better first-timer bread recipe, I’d love to know. I’m always learning from this awesome community — thank you.
Now go make some focaccia, and maybe force encourage a friend to make it, too. 😉
VIDEO TUTORIAL
Easiest Bread Recipe - Overnight Focaccia
Scaled down and summarized from this recipe by Alexandra Stafford
Servings: One 9-inch round focaccia | Active Time: 15 minutes | Resting Time: 18-72 hours (fridge) + 2-4 hours (room temp) | Baking Time: 20-25 minutes
Ingredients
2 cups all-purpose flour (250 g)
1 teaspoon fine sea salt (6 g)
1 teaspoon instant yeast
1 cup lukewarm water at 110-120F (240 ml)
3 tablespoons olive oil, divided
butter for greasing (optional but recommended if you’re using a pan that’s not nonstick)
Optional: 1-2 pinches flakey salt, for topping
Method
See video for guidance!
In a medium bowl, whisk together flour, salt, and yeast. Then add water and mix with a spatula until well-incorporated. Dough should be quite wet, sticky, and blob-like.
If the dough does looks dry or shaggy, add a teaspoon of water at a time and mix until it looks like the consistency in the video. You may need an extra 1-2 teaspoons of water.
Pour 1 tablespoon of olive oil on top of dough and a little on your fingers. Spread the oil around the surface of the dough. Cover the bowl with plastic wrap or an air-tight lid, and place it in the fridge for 18-72 hours.
A few hours before you’re ready to bake, take the dough out of the fridge. Prepare a pie plate (or similar-sized pan, See Note 1) by greasing it with butter. Then pour a tablespoon of olive oil into the pie plate.
Uncover the dough, and deflate it. This is done by running wet fingers around the inside of the bowl to release the dough. Then perform 6-8 stretch and folds. Place the dough in the pie plate and flip it once or twice so it’s totally coated in olive oil. Leave the dough in the pie plate, and let it rest for 2-4 hours, uncovered, at room temperature. The dough is ready when it has settled and stretched to take up most of the baking dish.
Set a rack in the middle of the oven and preheat oven to 425 F. Then pour a tablespoon of olive oil over the top of the dough and a little on your fingers. Firmly stick your fingers in the dough to create dimples all over, and gently stretch the bread if it isn’t filling out the whole pan. Sprinkle with flakey sea salt, if using.
Bake for 20-25 minutes, until the top is golden brown. Let cool for at least 10 minutes before removing and cutting into it. Enjoy! :)
Liked this recipe? Then give me some love 😊
Thanks so much for reading! This post was probably finished at 1am, tested in at least two different kitchens, and overthought to an embarrassing degree—all so you can make something delicious. It's all free, but if you want to support my morale, you can:
❤️ Drop a heart below (it’s free and easy)
💬 Leave me a comment - I read and respond to all of them (unless it’s mean, please don’t be mean).
➡️ Share or re-stack this post so other people can find it (help me achieve my dream of becoming everyone's internet cooking friend)
😍 Become a free subscriber (no paid tier exists yet, so this is literally the VIP option)
I really appreciate it. I’m so glad you’re here!
Notes
(1) Alternative pans: You can make this in many different sized pans. For this exact recipe, I’d recommend something that is ~60-80 square inches, such as an 8x8 inch, a 9x9 inch, a 9 or 10-inch pie plate, or a similar-sized cake pan or springform pan. Alternatively, you can divide the dough in two and bake it in two loaf pans, or you can double it and bake it in a 9x13 inch. Finally, you can divide it and bake it in a muffin tin, which I’ve seen online but haven’t personally tried. For smaller pans, it should take 20-25 minutes. For larger pans, it will take 25-30 minutes.
(2) Ingredients: Different brands of yeast and flour will affect your bread. For yeast, I’ve had success with Fleischmann’s, Red Star Platinum, and Dr. Oetker (hard to find in the US). For flour, I’ve used Gold Medal and Trader Joe’s (both organic and conventional) - all worked great!
(3) Storage: This focaccia is best eaten day-of. Leftovers can be stored in an airtight container or Ziplock bag for 2 days at room temperature, or frozen for up to 2 months. If the bread goes stale, make breadcrumbs with it! You can use them in a dish (like meatballs or kofte), or you can fry them in olive oil and use them as a topping on pasta or salad.
This is the BEST focaccia by far, that I have ever tasted... maybe the best bread! And so easy. The only comment that I would make is that the flakey salt should not be considered optional. Even a little of this salt takes the bread to a whole new level.
Almost perfect, would look up glyphosate free flour to use as well - for truly better nutrition.